A couple of years ago the BBC distributed nearly a million BBC Micro:bits to schools in the UK as part of the BBC’s Make it Digital initiative. It was generally considered a resounding success, as described for example in this article from the BBC website.
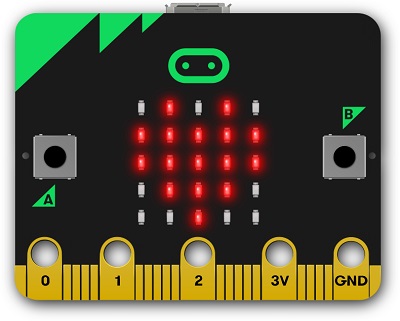
The BBC Micro:bit is a pocket-sized programmable computer which you can control to make exciting projects using a 5x5 LED display, programmable buttons, a motion detector and much more. It opens up all sorts of creative possibilities and makes learning about programming and computing great fun.
You can program the BBC micro:bit in several ways, including using Swift and a a block editor. In this article I want to show how to get started using Python with your BBC micro:bit.
You can purchase a starter kit containing everything you need to to use a BBC micro:bit with your desktop or laptop computer here:
[products ids=”1644″]
Whats follows is an introduction to how to get started using Python to program your BBC micro:bit.
Setting up your BBC micro:bit
It’s basically a matter of plug and play to get set up with your BBC micro:bit. There is a Quick Start Guide here. In a nutshell, you just need to:
- attach the battery pack to the BBC micro:bit
- connect it to you PC/Mac with the USB cable
- this will create a
microbit“drive” on your machine
Running your first Program
Now we can run programs by sending files to the microbit drive just created above
- go to the online Python editor
- download the sample program you find there and save it somewhere convenient with a name ending in
.hex. E.g. Download to a folder calledmicrobit projectson your desktop and name it ashello.hex. - On windows, right click this file and select
send to -> microbit. - On Mac, drag and drop the file into to
microbit“drive”. - That’s it – after a few seconds the
hello worldprogram should run on the BBC micro:bit.
Each time you create a new program in the editor, your should give it a new name when you download it, and build up a collection of files for later use as you go.
Python for the BBC micro:bit
So now some examples to give you a feel for what’s is possible and how Python works on the BBC micro:bit
The Hello world program you just ran looks like this:
from microbit import *

while True:
    display.scroll('Hello, World!')
    display.show(Image.HEART)
    sleep(2000)
You are going to need to frequently consult reference docs as you learn, so keep this page open. Please note that the intro mentions the mu editor which you will probably want to download and use eventually, but this article refers to the online editor as my aim is to get you up and running with the minimum amount of setup (aka yak shaving in the trade).
So why does the above code work?
While True is the way we tell Python “just keep on doing this,” so everything indented within the while block repeats indefinitely.
display.scroll('Hello, World!')scrolls “Hello, World” across the display.display.show(Image.HEART)displays the pre-existing image called “HEART”sleep(2000)waits for 2000 milliseconds (two seconds)- and the whole thing loops “forever”…
Images
Let’s step back a bit and just display a simple image. You can find a list of available images here.
from microbit import *

display.show(Image.HAPPY)
Easy huh?
Try some others for yourself.
What about alternating two images?
Well this requires a loop, so we bring back while True:
from microbit import *

while True:
    display.show(Image.HAPPY)
    sleep(1000)
    display.show(Image.SAD)
    sleep(1000)
(Don’t forget to name your downloaded code with the .hex extension before sending it to the BBC micro:bit)
BTW, why do we need the second sleep(1000) instruction? If you can’t see why, try removing it and seeing what happens.
DIY images
If you want to make your own images, you can do so with the following syntax. The numbers are the brightness values (from 0-9) for each LED in the 5x5 grid. 0 means off.
from microbit import *

my_diagonal = Image("90000:"
             "09000:"
             "00900:"
             "00090:"
             "00009")

display.show(my_diagonal)
OK so there is FAR more to explore on the the BBC micro:bit. In future articles we will cover event loops, sensors and more, but for now I hope this was a helpful introduction to the fun and creativity that can be experiences with the BBC micro:bit.
